Collaborate on a spreadsheet
The people you’ve shared a spreadsheet with can view or work on it at the same time as you or at other times. Remember that people who have Editor privileges to your spreadsheet can change all aspects of it. Having multiple people making changes to a spreadsheet can get confusing. In most cases, setting everyone to Commenter is the best way to collaborate in Sheets. People can attach comments to specific cells, but their comments won’t interfere with your spreadsheet’s data.
To add a comment: Click inside a cell and, from the toolbar above your spreadsheet, click the Insert comment icon (the speech balloon with a + toward the right end of the toolbar).
 IDG
IDG
Click this button to insert a comment.
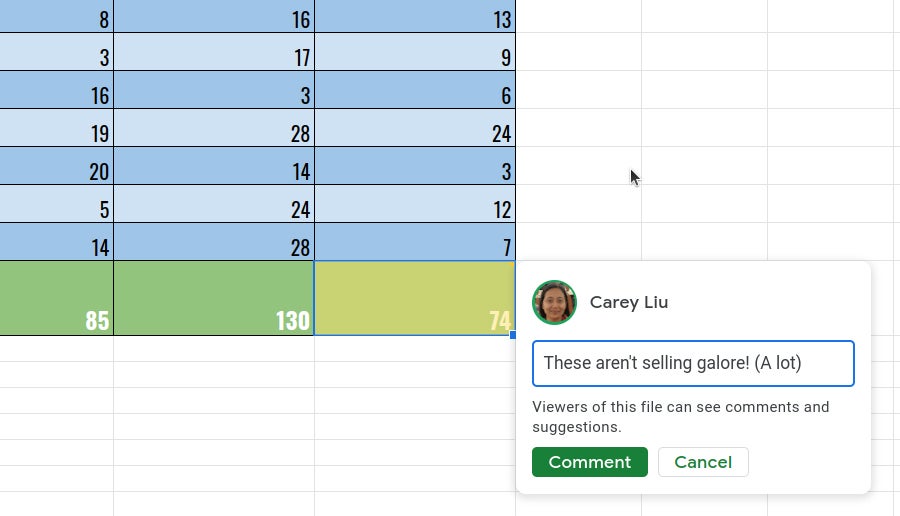
A blank comment card with your name on it opens by the cell. On this card’s entry line, type a brief comment, and when you’re finished, click the Comment button.
 IDG
IDG
Typing a new comment. (Click image to enlarge it.)
To draw someone’s attention to a comment: As you’re composing the comment, type the @ symbol and begin typing their name, then select the person from the list of suggested Google contacts that appears. They’ll receive an email notifying them of the comment and linking to it.
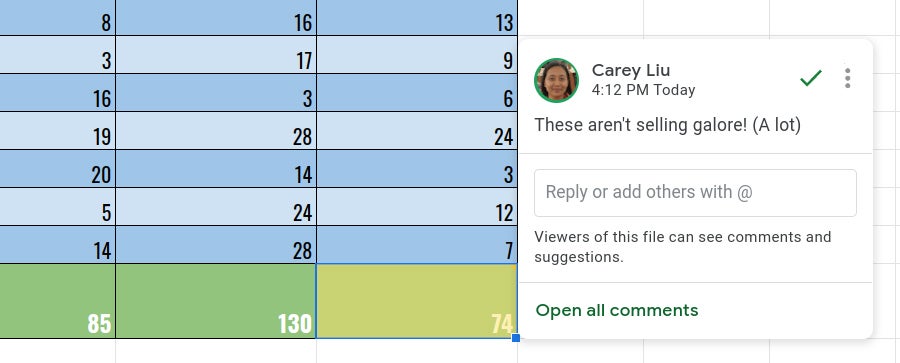
To read and reply to a comment: A cell that contains a comment is denoted by a tiny triangle at its upper-right corner. To read it, move the pointer over the cell; the commenter’s name and their comment will appear next to it.
To reply, click the card or cell. The card will expand to reveal an entry line where you can add a comment in response. Click Reply when you’re done. The comment card will now show the original comment and all replies to it.
 IDG
IDG
Reading and responding to a comment. (Click image to enlarge it.)
To edit, delete, or resolve a comment: Clicking the green checkmark marks this comment card as “resolved” and removes the card from the main spreadsheet. Clicking the three-dot icon at the upper right corner of a comment opens a menu that lets you edit, delete, or get a link to your comment.
To see a list of all comments: Click the Open comment history icon (the speech balloon) at the upper right of the Sheets window, next to the “Share” button. A sidebar will open along the right side of the screen; it lists all the comment cards in your spreadsheet. When you click a comment on this list, the view of your spreadsheet in the main window will jump to the cell where the comment is located and open its comment card. You can reply to the comment in the Comments sidebar or in the comment card on the main spreadsheet.
 IDG
IDG
The Comments pane lets you quickly review all comments and jump to specific ones. (Click image to enlarge it.)
Resolved comments appear at the bottom of the Comments sidebar. Replying to a resolved discussion reopens it and restores it to the spreadsheet.
For more details about collaborating on your spreadsheet, including what it’s like to collaborate in real time, see “How to collaborate on a document” in our Google Drive guide.
Recover older versions of a spreadsheet
Mistakes happen, and you may want to undo changes to a spreadsheet. Fortunately, Google periodically saves backups of your spreadsheet, making it easy to revert to an earlier version.
Click File > Version history > See version history. This opens a panel on the right that shows a list of older versions of your spreadsheet.
To view an earlier version of your spreadsheet: Click the date for it in the list. That version of the spreadsheet will then appear in the main window.
 IDG
IDG
Viewing an earlier version of a spreadsheet with Version history. (Click image to enlarge it.)
To restore an earlier version so it replaces your current spreadsheet: Click the green Restore this version button at the top of the screen. The restored version will then appear at the top of the version history list.
To give an older version a unique name: Click on its date. You’ll be prompted to type in words to replace the date. (The date and time will then appear in smaller size underneath the new name.)
Download and export a spreadsheet
Google Sheets lets you download spreadsheets for use elsewhere. On the top menu, select File > Download as and choose a file format. You can save your spreadsheet to your PC as an Excel (.xlsx) file or in one of five other formats, such as .csv or PDF.
 IDG
IDG
Downloading a spreadsheet. (Click image to enlarge it.)
7 tips for working with Google Sheets
Now that you know the basics, try these intermediate tips.
Use the Google Sheets mobile app
With the exception of the Version history tool, the Google Sheets app (available for Android, iPhone, and iPad) has many of the same features described in this guide. You’re unlikely to want to do any heavy spreadsheet editing on a phone screen, but the mobile app is handy for making quick edits, as well as sharing and commenting on sheets.
Toolbars along the top and bottom of the screen let you add comments and new sheets to your spreadsheet. Tapping a cell brings up new top and bottom toolbars. The functions on these toolbars let you add columns or rows next to the cell, or edit the formula or text inside it.
Click the three-dot icon at the far right of the top toolbar to use the Explore tool or to share your spreadsheet with others. (See “Sharing a document from the Google Drive, Docs, Sheets, and Slides mobile apps” in our Google Drive guide.)
 IDG
IDG
Two views of the Google Sheets Android app. (Click image to enlarge it.)
Clean up your data
Google Sheets can help you check and edit the data consistency of your spreadsheet. On the menu bar at the top of the screen, click Data > Data cleanup > Cleanup suggestions. A sidebar will open to the right of the screen. This tool analyzes your spreadsheet and offers suggestions to improve its look and performance, such as adding formatting to numbers, deleting duplicate rows, fixing inconsistent data, and more. Try this out if you have an old, complex spreadsheet that could use a review and freshening up.
 IDG
IDG
Sheets can offer suggestions for cleaning up your spreadsheet.
Navigate your spreadsheet faster with named ranges
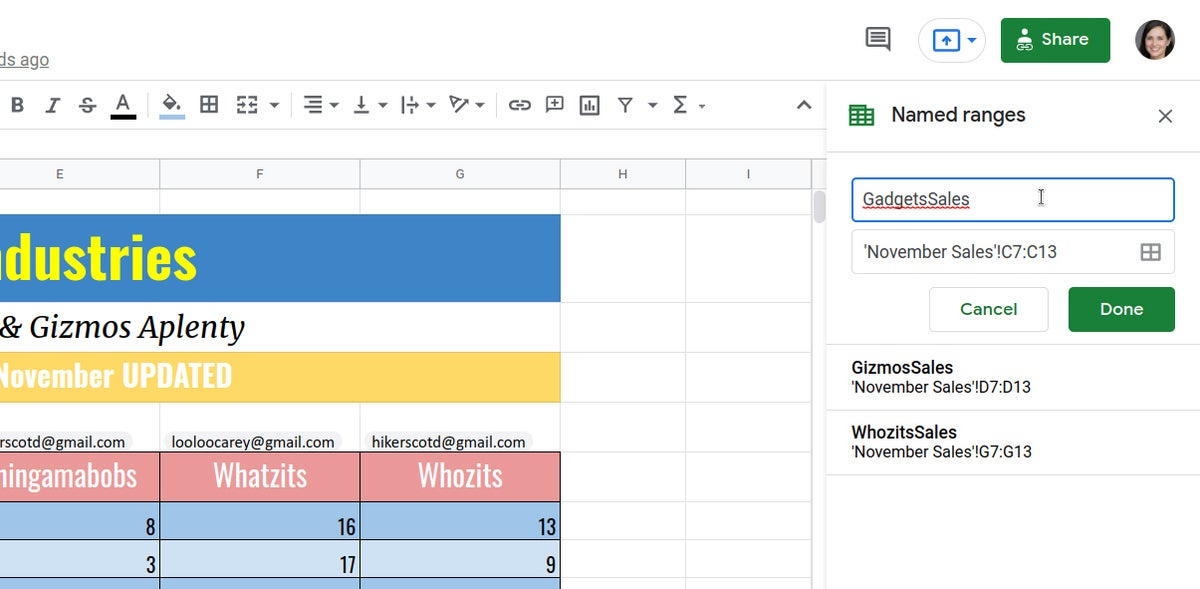
If your spreadsheet has several sheet pages, or a single sheet that can’t be seen all at once in the main window, use the “Named ranges” tool to design it for easier navigating. To open this tool, click Data > Named ranges on the menu bar at the top of the screen. Or, toward the upper-left corner of your spreadsheet, click the down arrow and select Manage named ranges. This opens a “Named ranges” sidebar along the right of the screen.
With this sidebar open, click a cell or select a range of cells in your spreadsheet. Then, in the sidebar, click Add a range. Give this cell or range of cells a unique name. You can build a list of other named cells and cell ranges this way.
From then on, whenever you open this sidebar or click the down arrow at the upper left of your spreadsheet, you’ll be able to jump your view of the spreadsheet right to a cell or cell range that you named.
 IDG
IDG
Naming cells or ranges can help you find them fast later. (Click image to enlarge it.)
Get suggestions for a spreadsheet with the Explore tool
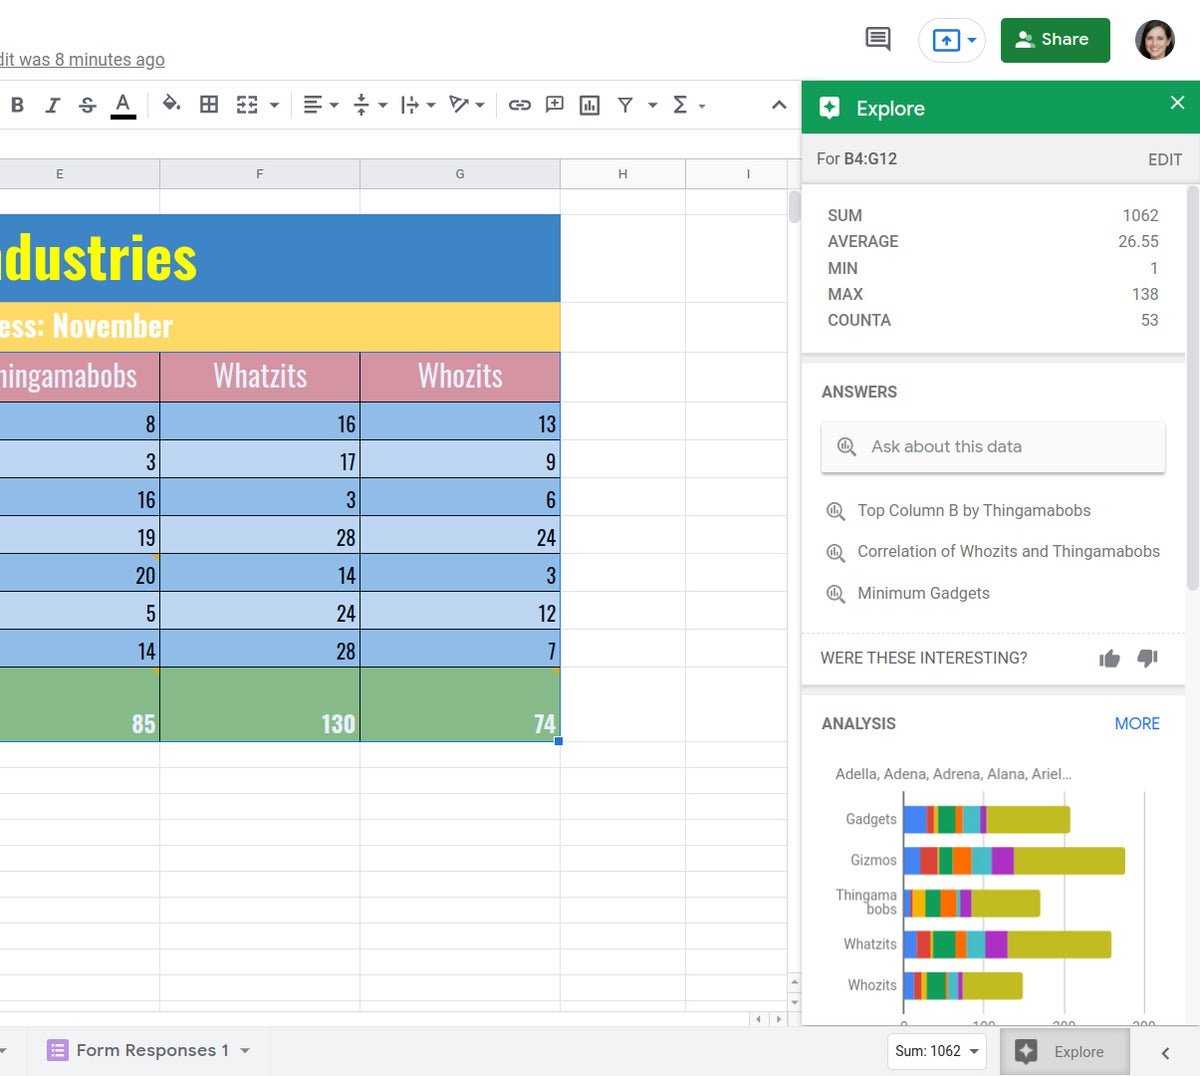
On the lower-right corner, click the Explore icon to open the panel for this tool. Explore analyzes your spreadsheet and helps you calculate answers to questions that you type in using natural language.
For example, say you have a spreadsheet that lists sales figures (denoted as “price” on your spreadsheet) made by a specific person (“Mary”). When you type “What’s the sum of price by Mary?” Explore should show you the total in sales that Mary made.
By default, Explore provides analysis and suggestions for the whole spreadsheet. You can adjust this by clicking Edit in the upper right of the Explore sidebar. Alternatively, you can select a range of cells that you want analyzed and then click the Explore button.
 IDG
IDG
The Explore feature helps answer questions about your data and suggests relevant charts, formulas, or pivot tables. (Click image to enlarge it.)
Explore may show you charts that illustrate the data in these cells, but it doesn’t always do so. This can depend on how the data within a range of cells you've selected relate to row and column headings (e.g., the names of salespeople and the items they've been selling). Explore may also suggest formulas and pivot tables for your spreadsheet.
You can drag a suggested chart or formula from the Explore panel onto your spreadsheet, or insert a pivot table into your spreadsheet by hovering the pointer over it and clicking the Insert pivot table button.
Add contacts to your spreadsheet
You can insert into a cell a mini profile card of a person in your Google contacts. Typing the @ symbol inside a cell will open a panel that lists a few suggested people in your contacts. Or, you can type the person’s name or their email address to pull them up from your contacts. Click the person’s name and it’ll be inserted into the cell.
(If you try to add someone doesn’t have access to the sheet, you’ll be notified and walked through the steps of inviting them.)
This is handy in scenarios where a particular person is in charge of one of the items being tracked in the spreadsheet, for example. When you hover the pointer over the cell with their name, a mini profile card for them will pop up. On it, you can click links to email this person, start a chat message or video call with them, or add them to an event on your calendar.
 IDG
IDG
Mini profile cards provide quick ways to contact someone right from a spreadsheet. (Click image to enlarge it.)
Present your spreadsheet in Google Meet
One way to solicit feedback on a spreadsheet is to present it during a Google Meet meeting. Toward the upper right of the screen, click the icon of a box with an up arrow inside it. From the panel that opens, click to enter a meeting that’s scheduled on your Google calendar today, or type/paste in the web link or code that you have for another meeting.
For more details about using Google Meet, including collaborating with it, see our Google Meet cheat sheet.
Use keyboard shortcuts
Save time in Sheets by using keyboard shortcuts for common tasks. Below are some of the most useful to know. For more, select Help > Keyboard shortcuts from the top menu when you have a spreadsheet open or press Ctrl + / (Windows, Chrome OS) or ⌘ + / (macOS).
Handy Google Sheets keyboard shortcuts
This article was originally published in August 2019 and updated in March 2022.


