Google Keep lets you create notes and to-do lists that sync across your computer and phone or tablet. It's handy in a variety of ways: You can record voice memos, and Keep will transcribe them as text notes. You can include images in your notes, and if text is shown in an image, the image shows up in search results. You can create time- or location-triggered reminder notifications based on your notes. You can share your notes with other people and collaborate on them.
Keep is free for individual users and included with a subscription to Google Workspace. You use it through a web browser on your computer, and it’s also available as an app for your Android or iOS device. You’ll get the most mileage from Keep if you use both the desktop browser version and the mobile app in your daily workflow, so that you can take notes and access them wherever you are. Your Keep notes will sync to the cloud through Google Drive.
This guide walks you through how to quickly start using Keep. The screenshots and descriptions of the user interface refer specifically to the web version, but the same features are in the Keep mobile app — just laid out differently.
Meet the Keep home page
Start by going to keep.google.com. If you’re not already signed in with your Google account (with Gmail or Google Workspace), you’ll be prompted to do so.
Keep’s home page comprises a main board in the center and a sidebar along the left. The first time you use Keep, this main board will be empty; once you start adding notes, they’ll appear here. The white bar in the center of the main board (with “Take a note...” inside it) is what you use to create notes.
 IDG
IDG
Your first view of the Google Keep home page. (Click image to enlarge it.)
Create a new note
Start typing inside the “Take a note” text box. As you type, the white bar expands down and becomes a new note. You can type in whatever text you want or paste in text that you've copied from another source.
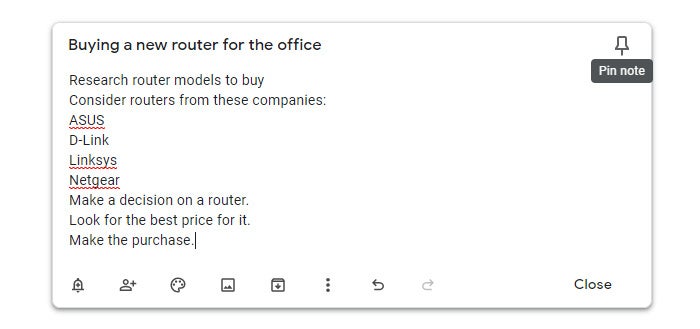
Along the top of the note, you can type in a title for your note. To the right of this title line is a pushpin icon. When you click it, this prioritizes the note by pinning it toward the top of the main board. (You’ll find more details about how pinned notes work later in this guide.)
 IDG
IDG
Clicking the pushpin icon pins the note near the top of your notes board.
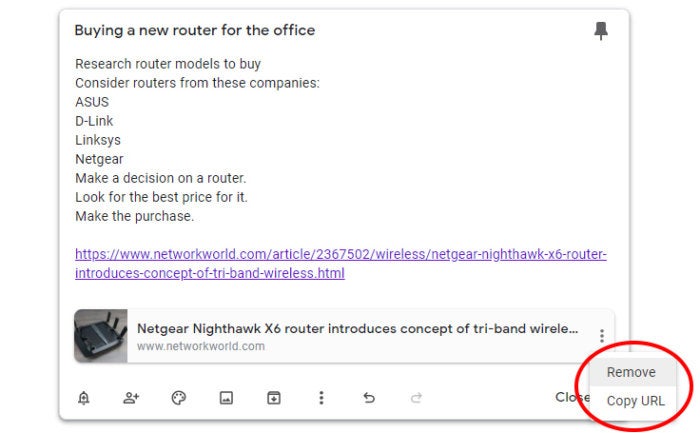
If you paste in a web link, a preview of the linked page appears along the bottom of the note as a thumbnail with sample text from the page. Clicking the preview opens the link in a new browser tab. To remove the preview, click the three dots that appear over the right end of this preview and select Remove.
 IDG
IDG
You can remove link previews.
For each additional link you add, a preview for it is added to the bottom of the note, below the preview for the previously added link. This link preview feature may not work for every link you paste into your note, though. (It can also be turned off under Keep's settings, described later in this guide.)
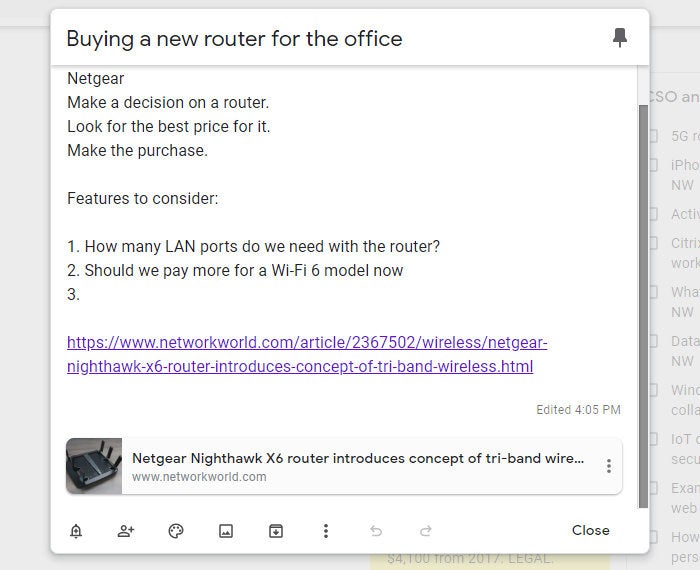
If you want to create a list of numbered items in your note, start a line by typing 1. Then type your text and press the Enter key; the next line automatically begins with "2." You can delete this subsequent number by pressing the backspace key.
 IDG
IDG
If you start a numbered list, Keep automatically numbers subsequent lines.
5 more ways to create Keep notes
Here are other ways to create a new note in Keep:
- Start a to-do list by clicking the checkbox icon at the right end of the “Take a note” bar. Then follow the steps in “Turn a note into a to-do list” below.
- Draw a doodle to put into the note by clicking the paintbrush icon at the end of the “Take a note” bar. Then follow the steps in “Add a drawing” below. Note that this tool is available only when you use Keep in Chrome, Chrome OS, Microsoft Edge (based on Chromium), or Opera, as well as the mobile app.
- Upload an image to put in the new note by clicking the picture icon at the end of the “Take a note” bar. Then follow the steps in “Add or remove images” below. If you’re using the mobile app, you can take a photo with your phone or tablet.
- In the mobile app, record a voice memo by tapping the microphone icon. Start speaking, and Keep will transcribe your spoken words into text in real time.
 IDG
IDG
Tap the microphone icon in the toolbar at the bottom of the Keep mobile app to record a voice memo.
- Finally, Google offers a Keep extension for Chrome. After you've installed it, right-click the Keep icon to the right of Chrome’s address bar and choose "New blank note." (To save a web page to create a new note, left-click that same Keep icon. To use text on a web page to create a note, highlight the text, right-click on this highlighted text, select “Save to Keep.” To save an image on a web page to create a note, right-click the image, select “Google Keep Chrome Extension” and “Save image to Keep.”
Enhance your note
At the bottom of a note is a toolbar that lets you take various actions on a note. Starting from the left...
Set a reminder for your note
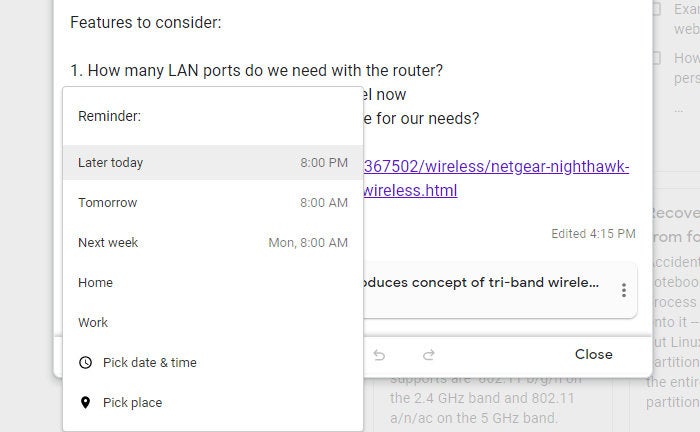
Click the bell icon to pick a day and time when you want Keep to send a notification to your computer, phone, or tablet about this note. Select one of Keep’s suggested reminder times or Pick date & time to set a custom time for the alert to appear. You can use this function to remind you of an appointment or other important event.
 IDG
IDG
Remember important items or events by creating a note and adding a reminder.
You can also choose Pick place to set location-based reminders. For instance, you could remind yourself to check in with your boss when you arrive at the destination airport during a business trip.
Invite collaborators
The headshot icon lets you share the note with others so that you can work on it together. These people can be from your list of contacts saved under your Google account (or your corporate directory under a Google Workspace account), or you can invite people by entering their email addresses. They'll get an email inviting them to collaborate on your note; they will need to sign in with a Google account to do so.
 IDG
IDG
Need help with a note? Invite collaborators.
The people you invite to collaborate can change all aspects of your note, as described throughout this guide, except for deleting the note.
Change a note’s background color
The palette icon lets you change the background color of the note. You can choose from 12 colors.
 IDG
IDG
A background color can help a note stand out on your board.
You may find it helpful to change a note’s background color to make it easy to spot on the main board, or to designate notes under a similar category with the same color. Or you could come up with a color-coded system — for example, red notes have the highest priority, while yellow notes get lower priority.
Add or remove images
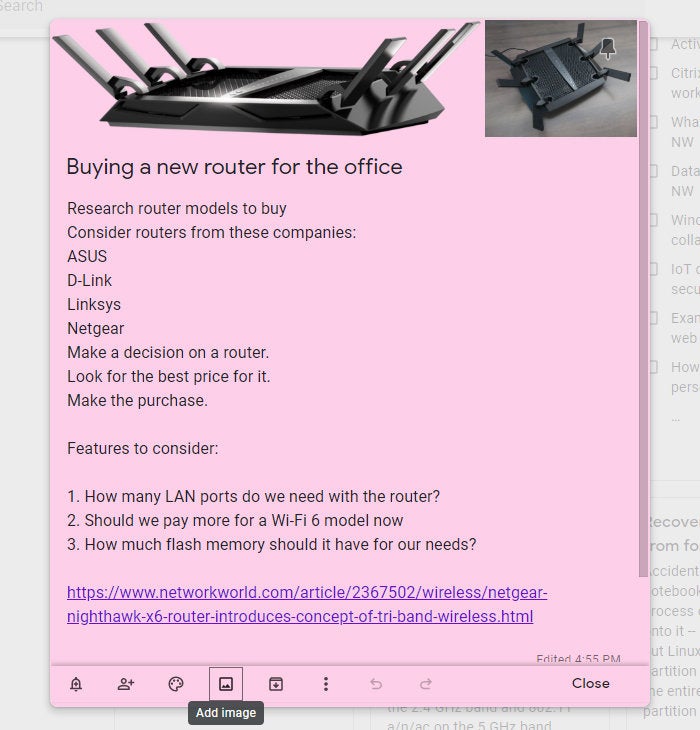
To add images to your note, click the fourth icon to select an image file stored on your computer or mobile device. It will appear at the top of your note.
 IDG
IDG
Images you add to notes appear at the top.
You can keep adding images; each subsequent image you add to a note appears to the right of the first image you added. When you click an image in a note, a viewer tool shows you the image in a larger size.
To remove an image, move the mouse pointer over it and click the trash can icon that appears on the lower-right of the image.
Archive a note
Clicking the “down arrow in a box” icon removes the note from the main board and stows it in your Keep account’s archive. This is a good place to put notes for safekeeping when you're no longer using them but don't want to delete them.
 IDG
IDG
Archive notes that you want out of the way but aren't completely done with.
Tag a note with a label
Tagging a note with one or more labels enables you to find them quickly later. For example, you can choose to see only the notes that you've tagged with the “Work” label on the main board. (Later in this guide we’ll discuss how to filter notes by label.)
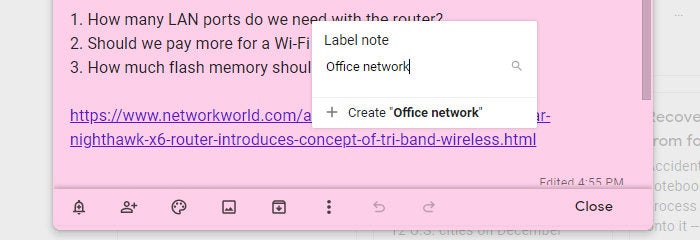
To add a label to a note, click the three-dot icon on the note’s toolbar and select Add label from the pop-up menu. (If your note already has a label, select Change labels from the pop-up menu.) You can tag your note with a new label that you type in a text box, or select the checkbox for a label that you’ve previously created. When you’re done adding a label to your note, just click anywhere outside of the “Label note” pop-up.
 IDG
IDG
You can create new labels on the fly.
You can remove a label from a note by hovering over it and clicking the X by the label.
Add a drawing
Remember, this option is available only if you’re using Keep in Chrome, Chrome OS, the Chromium-based Microsoft Edge browser, Opera, or the Keep mobile app for Android or iOS.
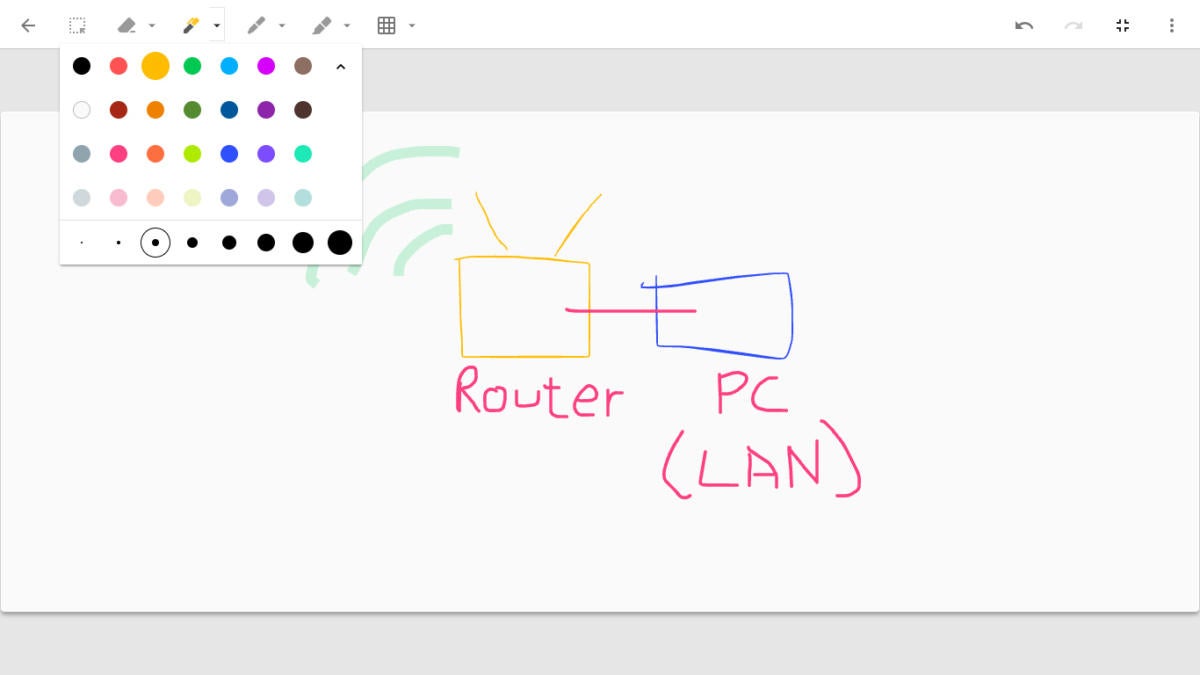
Click the three-dot icon on the note’s toolbar and select Add drawing from the pop-up menu. A simple drawing tool opens; you can use it to quickly sketch a doodle using a mouse, touchpad, or the touchscreen of your phone or tablet.
 IDG
IDG
Add a quick sketch to illustrate a point in your note. (Click image to enlarge it.)
When you’re finished, click the left-pointing arrow in the upper-left corner to return to your note. The drawing you sketched appears at the top of your note, and you can manage it like any other image.
Turn a note into a to-do list
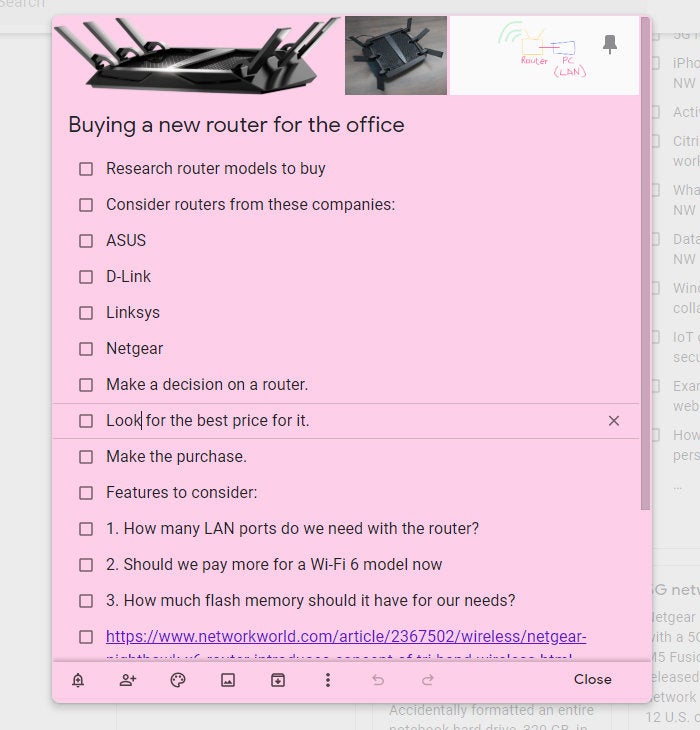
Click the three-dot icon on the toolbar and select Show checkboxes from the pop-up menu. Checkboxes will be set at the beginning of each line of text in the main body of your note. (If you turn this function on for a blank note by clicking the checkbox icon at the right end of the “Take a note” bar, each new line of text that you type will start with a checkbox.)
 IDG
IDG
Give yourself a feeling of accomplishment by turning your note into a to-do list and checking items off as you complete them.
If you hover your cursor over an item in your checklist, an icon with six dots appears to the left of its checkbox. You can rearrange the order of the checkbox items by clicking and holding the six-dot icon, then dragging and dropping the item into another spot in the list. (In the mobile app, the six-dot icons are always visible. Just press and hold one next to an item on the checklist, then drag and drop the item to another spot in the list.)
 IDG
IDG
You can drag and drop items in your checklist to rearrange them.
You can indent items in the checklist: Grab the six-dot icon next to an item, then drag it to the right and release. This allows you to make a checkbox item appear as a subsection below the item above it.
 IDG
IDG
Indent checklist items to make them subsections of your main list.
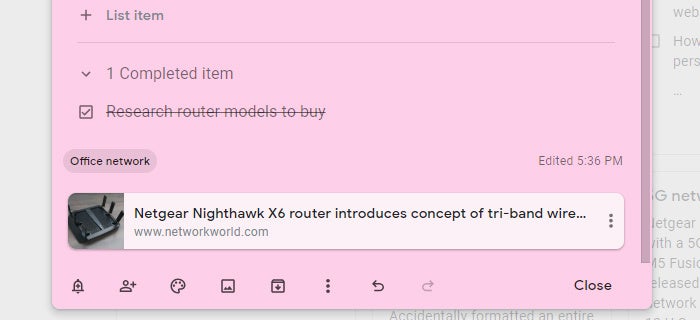
Clicking an item’s checkbox crosses out its line of text and sends it to the bottom of the note. If you click the checkbox again to remove the checkmark, this sends the checkbox line of text back to the list of unchecked lines. Its text will no longer be crossed out.
 IDG
IDG
Checking off completed items moves them to the bottom of the note.
You can delete a checkbox item by hovering the mouse pointer over it and clicking the X that appears over its right end.
 IDG
IDG
To delete an item outright (rather than cross it off), hover over it and click its X.
To uncheck or delete all items you’ve checked, or to hide the checkboxes, click the three-dot icon in the toolbar at the bottom of the note and select Uncheck all items, Delete checked items, or Hide checkboxes.
Extract text from images
If an image attached to your note depicts text, Keep can try to extract it. Click the three-dot icon, then select Grab image text to insert that text into your note.
 IDG
IDG
Keep can detect text in images and insert it into a note.
Send your note to Google Docs
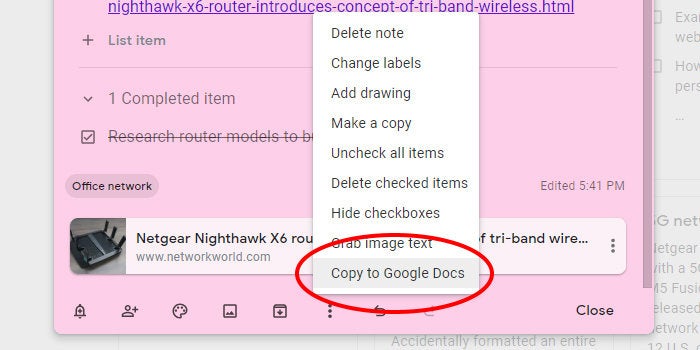
Click the three-dot icon and select Copy to Google Docs. A copy of the note will be sent to your Google Drive, where work on it in Google Docs, Google’s web-based word processor, as a normal document.
 IDG
IDG
When a note starts to turn into a missive, send it to Google Docs for more advanced editing options.
Finish your note
When you’re done tweaking your note, click Close. This shrinks down the note and sends it to the main board of your Keep home page. You can reopen a note by clicking it, make any changes to it, and click Close again.
 IDG
IDG
Click Close to save your note and send it to the main board.
Manage your notes
The main board of your Keep home page is where your notes appear. Imagine it as a big cork board that your notes are pinned to as cards. Once you’ve created several notes, it can be difficult to find the one you want. But never fear: Keep has a number of ways to make them easier to find.
Arrange your notes
Notes that you've pinned (by clicking the pushpin icon to the right of a note’s title line) are set toward the top of the main board. More recently pinned notes appear first. Unpinned notes are pushed down toward the bottom.
 IDG
IDG
Pinned notes appear at the top of your board. (Click image to enlarge it.)
To rearrange your notes, just drag and drop one note to another spot on the main board. The other notes will rearrange themselves to accommodate the note in its new spot.
If you want to see a certain note at the top of your main board, pin it and then, after newer pinned notes displace it, drag and drop it closer to the top.
Search for notes
Along the top of your Keep home page is a search box you can use to search for text in your notes. You can also narrow down the search to certain types of notes (for example, those that contain drawings or voice memos), notes that have certain labels, or notes that you’ve shared with certain contacts. Keep provides handy shortcuts below the search box that you can click to look for notes containing these and other criteria. Notes that contain your search query will appear on the main board.
 IDG
IDG
Find notes quickly by using the search box up top. (Click image to enlarge it.)
Keep has some search tricks up its sleeve, too: Remember how it transcribes voice memos to text? That text is searchable. What’s more, if text appears in an image in a note, Keep can search that text as well.
Choose List view or Grid view
To the right of the search box are three icons: Refresh (a circular arrow — click this to reload your Keep home page), the List view/Grid view icon (two horizontal bars or four small squares), and Settings (a gear).
By default, your Keep home page is set to Grid view, which arranges your notes in a grid layout. Clicking the horizontal bars icon puts your main board into List view, which makes your notes wider and shows them in one long, single column. This can be better for scrolling through them on a phone screen, or if you'd rather see more information on individual notes at a glance.
When you’re in List view, the icon changes to four small squares. Click it to return to Grid view.
 IDG
IDG
Click the List view icon to see more of each note at once. If you prefer the default compact view, click the Grid view icon. (Click image to enlarge it.)
Navigate the left sidebar
Keep’s left sidebar helps you filter which notes are shown on the main board.
- Click Reminders to see only notes that you set with reminder notifications.
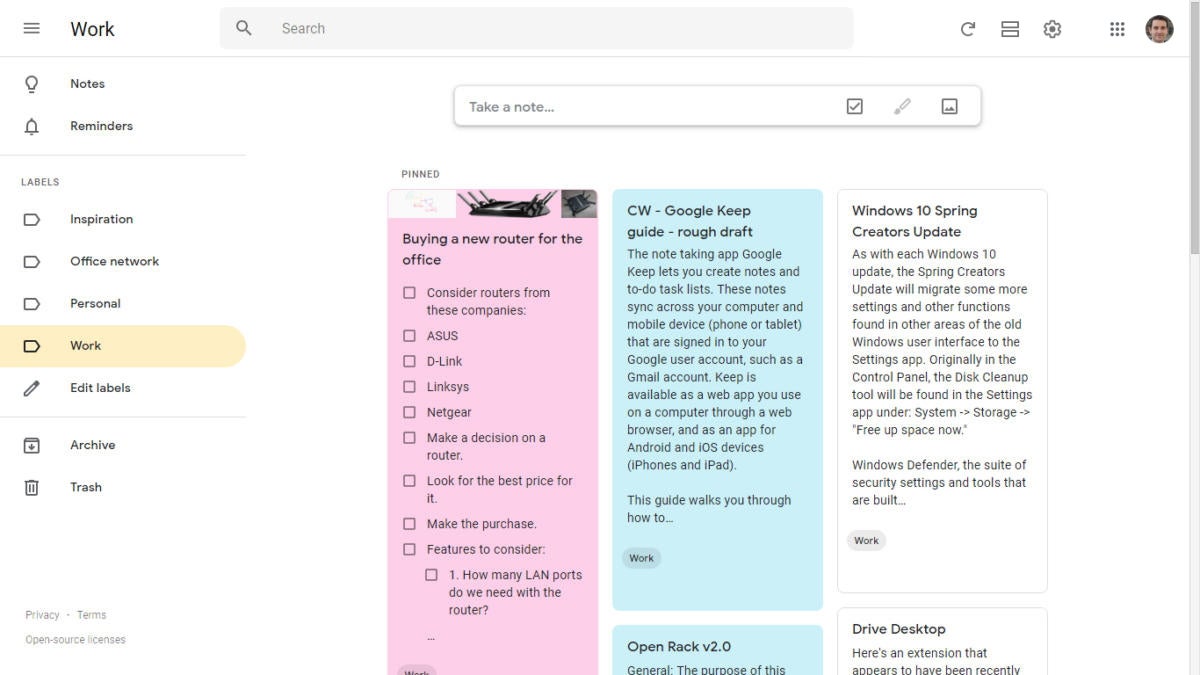
- Click one of the labels to see only notes that you've tagged with that label.
 IDG
IDG
The left sidebar lets you filter notes by label. (Click image to enlarge it.)
- Click Edit labels to create a new label, change the name of a label, or delete a label.
- Click Archive to see only notes that you've archived.
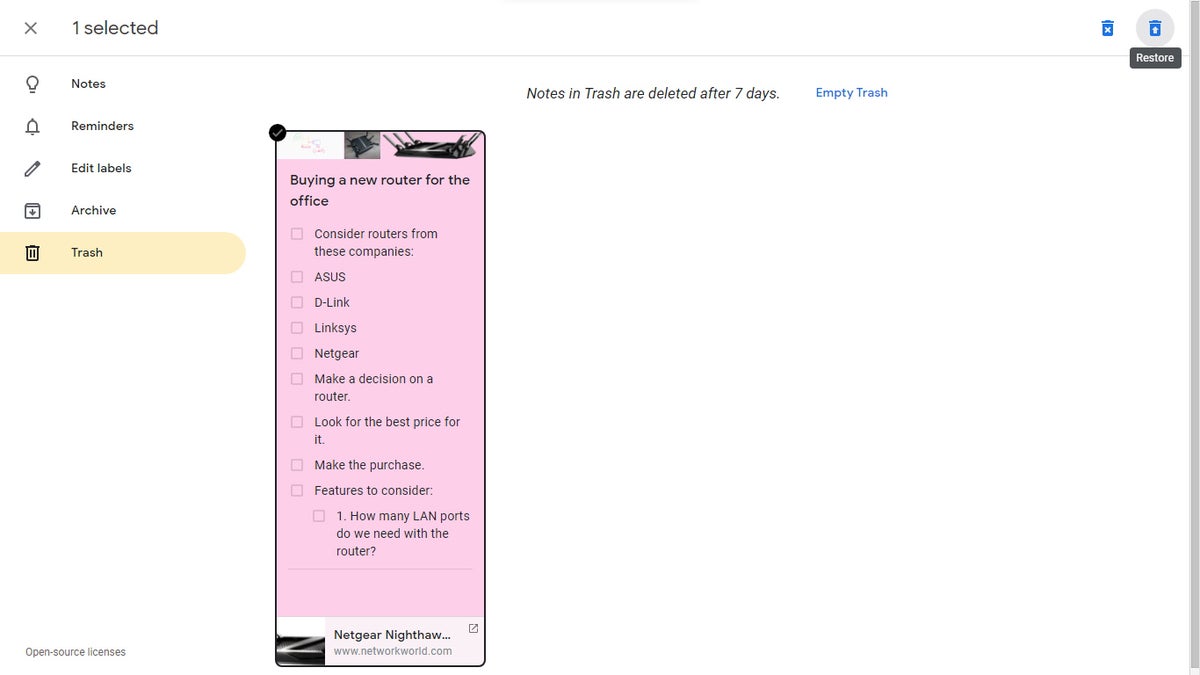
- Click Trash to see notes that you've recently deleted. From here you can restore a note to the main board. Otherwise, a deleted note stays in Trash for 7 days before it's removed forever from your Keep account.
 IDG
IDG
Select a note in Trash, then click the Restore button at the upper right of the screen to restore it to the main board. (Click image to enlarge it.)
Adjust settings
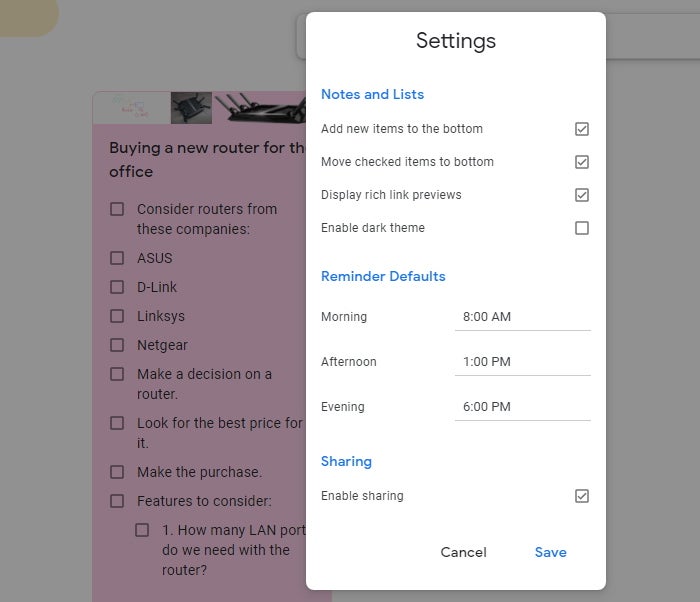
To the right of the List view/Grid view icon, click the gear icon and select Settings from the pop-up menu. A panel opens where you can customize the default times for your reminders, disable note sharing, turn off thumbnail previews for links in your notes, and more.
 IDG
IDG
Settings lets you tweak some of Keep’s default behaviors.
Use keyboard shortcuts
You can save time in Google Keep by using keyboard shortcuts to trigger some actions. Below are some of the most useful shortcuts. To see more, click the gear icon at the upper right of the Keep home page and select Keyboard shortcuts, or just type ? when you’re on the Keep home page.
Handy Google Keep keyboard shortcuts
This article was originally published in January 2019 and updated in October 2021.
Read this next: Tips to get the most from Google Keep on Android


