Have you ever used a spreadsheet to track a project, emailing updated versions to your team members to keep them apprised of where things stood? Of course you have.
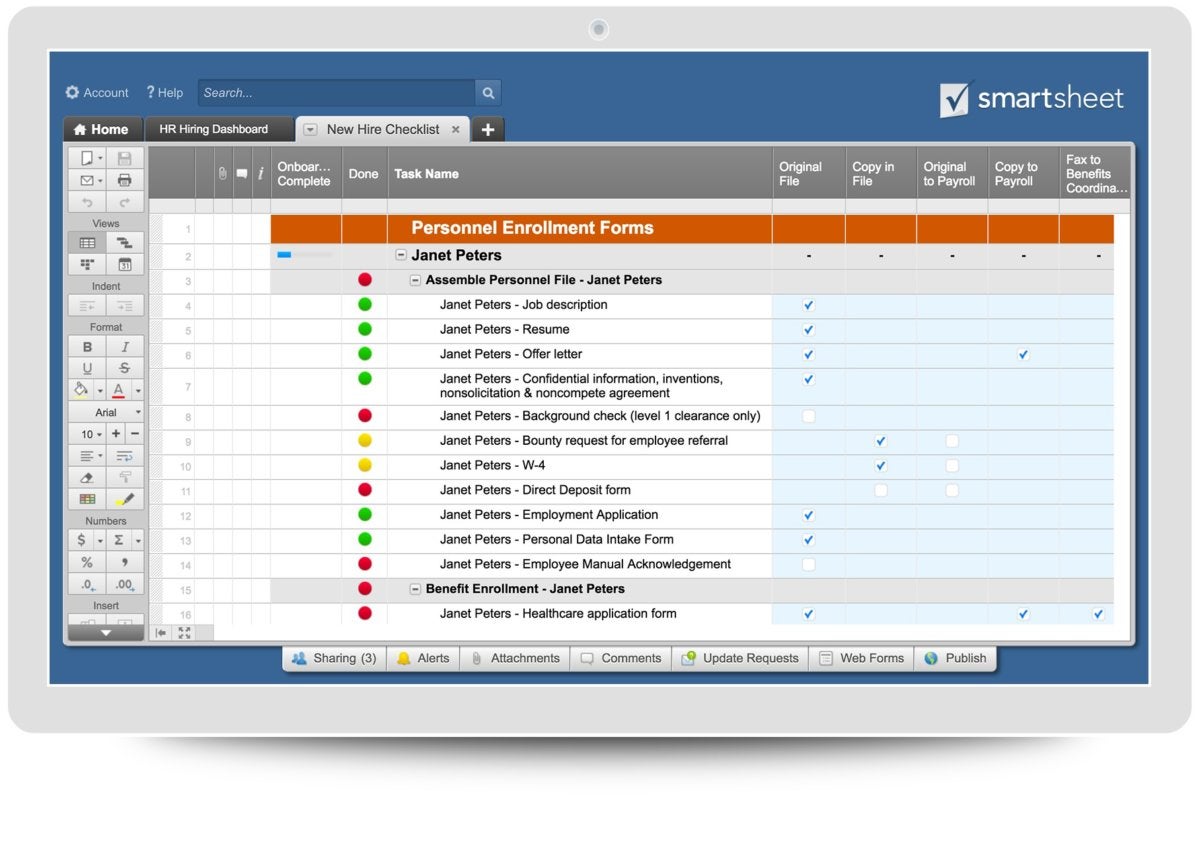
That simple fact — the popularity of spreadsheets for project management — is the raison d’être for Smartsheet, a sort of enhanced online spreadsheet app. Smartsheet adds such collaboration tools as in-app communications, automatic notifications, and flexible document sharing to the standard row-and-column, functions-and-formulas interface.
Smartsheet isn’t limited to the spreadsheet view, either. Those who prefer to manage projects with Gantt charts, Kanban cards, or a calendar can work in those interfaces as well. But as its name indicates, at heart it still carries a rows-and-columns orientation, with the tasks to be completed in the rows and information about them — assignments, due dates, etc. — in columns.
 Jake Widman / IDG
Smartsheet views project management primarily through a spreadsheet lens, with rows for the tasks to be completed and columns for details such as assignments, milestones, and so on. (Click any image in this story to enlarge it.)
There are lots of different ways to use Smartsheet, depending on what your particular needs and workflow are. (There’s also usually more than one way to do any particular thing.) We asked some experienced Smartsheet users to share their favorite tips and techniques. From setting up sheets to using them to share information, these tips can get you started with Smartsheet or take you to the next level.
1. Convert formulas from Excel
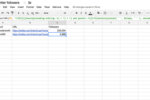
Smartsheet has its own syntax for formulas that’s not always the same as what you might be familiar with from Microsoft Excel. Smartsheet will convert the formulas if you import an Excel spreadsheet, but what if you already have a document set up in Smartsheet and want to add or change a formula? You can still take advantage of the conversion function: Open a dummy Excel worksheet, create your formulas there, and then import it. That will create a new sheet in Smartsheet with the formulas properly converted, and you can copy and paste from there.
 Jake Widman / IDG
Smartsheet can automatically convert Excel formulas to its own syntax (and will alert you if it can’t).
2. Use hyperlinks to group documents
Excel makes it easy to group related Worksheets into Workbooks. Smartsheet doesn’t offer that option, so you might need to find another way to indicate that one sheet is connected with others — if you’re sharing a group of sheets that should be filled out in order, for example. For that, you can add comments that work as hyperlinks to direct recipients from one sheet to another.
To link to a specific cell in another sheet, select a cell in the current sheet and click the link icon in the Insert section of the toolbox. To link to an entire sheet, right-click on the cell in the current sheet and choose Hyperlink from the pop-up menu.
 Jake Widman / IDG
Put hyperlinks in notes to direct readers to other, related sheets they should be sure to open as well.
3. Use Workspaces to share documents easily
As participants get added to teams, it can get tedious emailing them links to all the shared documents. Likewise, when people leave a team, it’s a chore to remove their privileges one by one. Smartsheet offers a better way, letting you set up Workspaces and designate who has sharing privileges. You create a new Workspace from the Home tab, from the Create New pop-up menu. With a Workspace selected, add people to (or delete them from) the Sharing list on the right to give them access.
You can duplicate sheets to multiple Workspaces by right-clicking and choosing Save As New, which is also a good way to distribute templates to ensure consistency among documents. And if someone leaves a team, you just need to delete that person from the Sharing list to revoke access.
 Jake Widman / IDG
Workspaces (“Locations” in this view) provide an easy way to manage access privileges to various sheets, as well as to quickly distribute standardized documents to multiple teams.
4. Set reminders
Whether you’re managing projects or just participating in them, chances are you need to stay on top of deadlines. Smartsheet lets you set a reminder for any row (rows are tasks, remember) using a drop-down menu on the left side of the row: Specify a day and designate a recipient. On that day, Smartsheet will generate a reminder email with the task name in the subject line, so the recipient knows what they need to do at a glance.
 Jake Widman / IDG
Smartsheet incorporates its own calendar and reminder function for making sure you and your team members stay on track.
5. Create survey forms
Sheets provide good ways to gather information, suggestions, or other input. Click the Forms button at the bottom of the screen and select Create New Form, and a form builder pops up. Boxes for each information category, based on the columns in your sheet, are already listed, and you can delete or add boxes or rearrange them. When you send the form to others, they get an email with a link that lets them fill out the information and submit it in their browser — they don’t need their own subscription to Smartsheet.
 Jake Widman / IDG
Creating a form based on a sheet’s existing structure is an easy way to gather information to populate a sheet or to conduct a survey.
6. Request updates
If you need an update on a project task — for example, id you want to find out whether the budget for a particular task has changed — you can use Smartsheet to generate and send a form with spaces for the information categories you designate. In the same drop-down menu you used to set a reminder, choose Send Update Request. You can set the request to be delivered on a particular date or even on a recurring basis. As with a survey, recipienta don’t need Smartsheet to update their information — the link just opens in their browser.
 Jake Widman / IDG
You can select a specific task and category of information to request an update, and the person receiving the request can update your sheet without having to have access to Smartsheet itself.
7. Get automatic notifications
With shared project management sheets, of course, someone might make an update without having to be asked. You can set up an automatic action to let you or others know when a change is made, even specifying what kind of change triggers the notification. You could, for example, trigger an automatic notification whenever a budget figure or an expected completion date is changed. (The alert can also be a request for approval, an update request, or a reminder.)
To set up a notification, click the Alerts & Actions button at the bottom of the screen, select Send a Notification from the pop-up menu, and set the conditions to trigger the notification.
 Jake Widman / IDG
You can set up conditions that will trigger an automatic notification when certain changes are made to a sheet.
8. Highlight status with conditional formatting
You can set up rules to apply conditional formatting to a row or column. For example, if a due date goes by with no update or without the task being marked Complete, you can have that task or the entire due dates column displayed in red. Another rule could be to fade out and strike through a task once it is marked Complete. Those two rules are among the default choices, but you can also create your own rules, defining a condition and the format, based on the tasks and categories in your sheet.
To set up conditional formatting, select a cell and click the Conditional Formatting icon (the little grid) in the Format section of the toolbox.
 Jake Widman / IDG
With conditional formatting, you can have cells automatically change appearance under predefined circumstances, such as a deadline being missed or a budget changing.
9. Share tasks
You don’t have to share entire sheets if you don’t want — you can share specific tasks (rows) individually. The email generated for recipients includes whatever information you specify, based on your categories — you could just send the task name and due date, for example, or include the budget, comments, and everything else. To share a task, click the little down arrow next to the row number (it appears when you hover over the number) and choose Send from the pop-up menu.
 Jake Widman / IDG
Share specific tasks, and specific details about them, by sending a row rather than sharing an entire sheet.
10. Attach documents to a task
You can attach documents to a row and include them when you share the task. You could use this feature to send the requirements or a standardized form for a bid you’re soliciting, for example. You add an attachment by clicking the down arrow next to the row number, as in Tip 9, and choosing Attachments from the drop-down menu.
 Jake Widman / IDG
Attaching a document to a task lets you share associated files from your computer and from online storage services.


![Computerworld > The Evolution of the iPhone [cover]](https://images.idgesg.net/images/article/2018/09/cw_evolution_of_the_iphone_01-100771459-small.3x2.jpg?auto=webp&quality=85,70)