Have you ever thought to yourself, “Gosh, it would be really helpful if these two services I use talked to each other! That way I could have computers help me remember things, get notified when things happen, and kick off actions when certain things change on one service or another.” You might think that’s a pipe dream. How would Slack talk to Salesforce talk to SharePoint?
Wonder no longer: Like its competitors IFTTT and Zapier, Microsoft Flow allows business professionals of all stripes to do just that: create automated workflows (Microsoft calls them “flows”) involving a series of tasks across certain applications or services — even different services — that send notifications, ask for and offer approvals, and handle rote tasks automatically, with no coding required. The automation tool is part of what Microsoft calls its Power Platform, a suite of AI-enabled and AI-enhanced process automation tools that includes Power BI for data analysis and PowerApps for app building.
Editor's note: At its Ignite 2019 conference in November, Microsoft announced that Flow would be renamed Power Automate. We have let the references to Flow remain in this story because the full rollout has not occurred to all Office 365 tenants.
You might think of Flow as an automated assistant that, when certain things happen, can trigger other actions. Some examples:
- When a new lead is received into the Microsoft Dynamics CRM system, a text message can be sent to a sales representative with details about the new lead, and at the same time, an email message can be sent to an administrative assistant to schedule a meeting with the new lead and the salesperson for an initial briefing.
- When you’re having a conversation within Microsoft Teams, the Flow bot can recognize certain phrases (or users can manually trigger such phrases) to flag something for a manager or send an email to another department automatically, right from within Teams, where the original thought process is happening.
- A survey you create in Microsoft Forms to send to customers after they buy your product or try your service can be configured to kick off a flow if a customer’s rating is too low (say, a 4 or 5 out of 10). That flow can send an email to a manager, text a customer service representative to follow up with the customer, or create an apology letter from a template in Office 365.
An unheralded benefit of Flow is its cross-platform — or rather, its cross-cloud-service — nature. It doesn’t work with just Office 365, but also with Google Apps, Slack, Dropbox, to-do apps like Todoist, Amazon services, contact databases such as Act! and Salesforce, and other popular services. Chances are your organization is using at least one service whose data and activities can be exposed and automated using a Flow template. Flows use components called “connectors” to access these services, and you can find them all on Microsoft’s ever-expanding list of supported connectors.
While anyone with a Microsoft account can use Flow for free (on a limited basis), connectors marked “premium” — such as Salesforce, MailChimp, and GoToMeeting — require a paid account. You’ll find details about Flow plans and pricing at the end of the story. Here we cover using Flow as a web app, but it’s also available as a free mobile app for iOS and Android devices.
Templates and types of flows
Often with a service like Flow, you get a bit of the writer’s “staring at a blank page” syndrome, where you don’t even know where to begin. What’s even possible? Fortunately, Microsoft has made available templates that show a bunch of a different possibilities: surf over to its templates gallery to get a sense of what you can do, from saving email attachments in a SharePoint library to recording form responses from a Google Sheet (yes, really!).
 IDG
IDG
Browsing through Flow’s templates gallery can help you understand the kinds of things you can do with flows. (Click image to enlarge it.)
One last thing before we get started: It’s helpful to know about the different kinds of flows you can create. There are four different types:
- Automated flows are triggered by certain events happening within a product or service (like a certain keyword being sent in a message).
- Instant flows are triggered by a user pressing a button either in Flow Mobile or on the Microsoft Flow web portal.
- Scheduled flows trigger once a day, hour, or minute; on a date that you specify; or after a number of days, hours, or minutes that you specify.
- Business process flows are like wizards but for certain business workflows you need to follow, like onboarding a new customer or upgrading a certain account from one service type to another; this type of flow has a visual guide to represent how far through the entire process the user is at any given moment.
Let’s look at a couple of examples — an automated flow and an instant flow — to show how all these elements work together and how you can create your own flows.
Demo flow 1: Notifications from Google Calendar events
For our first example, I’ll use a scenario close to home. I have a calendar in the Google Calendar service that others at my corporate job have access to and can use to schedule meetings and appointments on my behalf. Unfortunately, my wife does not have access to this calendar, as her primary calendar is in her company’s corporate Exchange system.
It would significantly reduce the headaches in our household if my wife were notified each time someone books travel for me as each instance is added to my calendar; then I would never forget to tell her about a trip, and she would have ready access to the dates and any changes as soon as they happen. That way she can book her travel as necessary around mine and we can avoid the “you didn’t tell me you were leaving town then!” discussions.
Enter this flow, which will trigger each time an event is added, updated, or deleted from my corporate Google Calendar. It will detect this change and then send an email with the details directly to my wife. As a failsafe, I’ll also have the flow create a new section in our shared OneNote notebook with my trip details; there I can add in my flights, hotel, and other itinerary information so that it is all in one place. (This is in-depth defense to ensure the day-to-day smooth operations of my marriage; your mileage may vary.)
This example will demonstrate how to create a new automated flow via the Flow creator site, using two connectors: Google Calendar and Microsoft OneNote.
To start off, go to the Microsoft Flow site and sign in. (The “Sign in” link is at the upper right.)
If you’re starting from the “Flows” screen in Flow (click My flows in the left navigation pane to get there), click the the + New menu and select Automated — from blank. From any other screen, you can start by clicking + Create in the left panel. Then, in the “Start from blank” area at the top of the screen that appears, select Automated flow.
Either way, the “Build an automated flow” screen appears. Enter a friendly name for the flow — in this case, we’ll call it “Calendar Updates” — and then choose the trigger for the flow, the action that kicks off the entire thing. If you search for “Google Calendar” in the search box, several Google Calendar-related triggers appear in the list below. The trigger we are going to use is “When an event is added, updated, or deleted” — check the box beside it to select that trigger, and then click the Create button at the bottom of the screen.
 IDG
IDG
Choosing the trigger for an automated flow. (Click image to enlarge it.)
You’ll be prompted to sign in to the Google account that contains the calendar whose events you want to trigger the flow; do so, and then you can click in the Calendar ID box and select the appropriate calendar.
 IDG
IDG
Connecting the appropriate Google Calendar account. (Click image to enlarge it.)
Click the + New step button when you’re finished, and the next part of the workflow (“Choose an action”) will be added below the Google Calendar trigger.
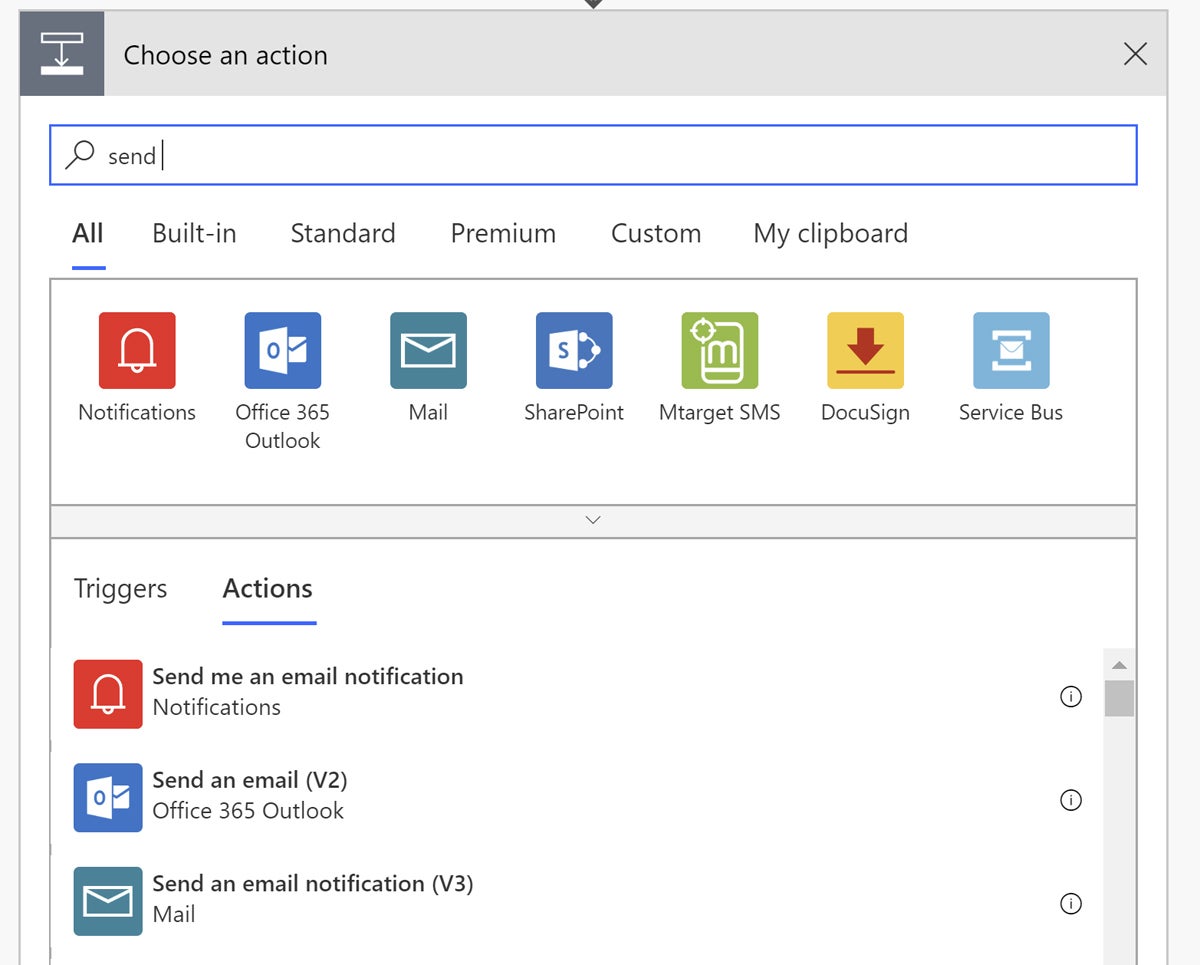
Here you’ll be prompted to choose the action to take once the trigger is, well, triggered. Recall that we want to send an email to someone with the details of the calendar change. We’ll search for “send email,” and under Actions, we’ll find “Send an email notification (V3).” Let’s choose that.
 IDG
IDG
Choosing an action for the flow. (Click image to enlarge it.)
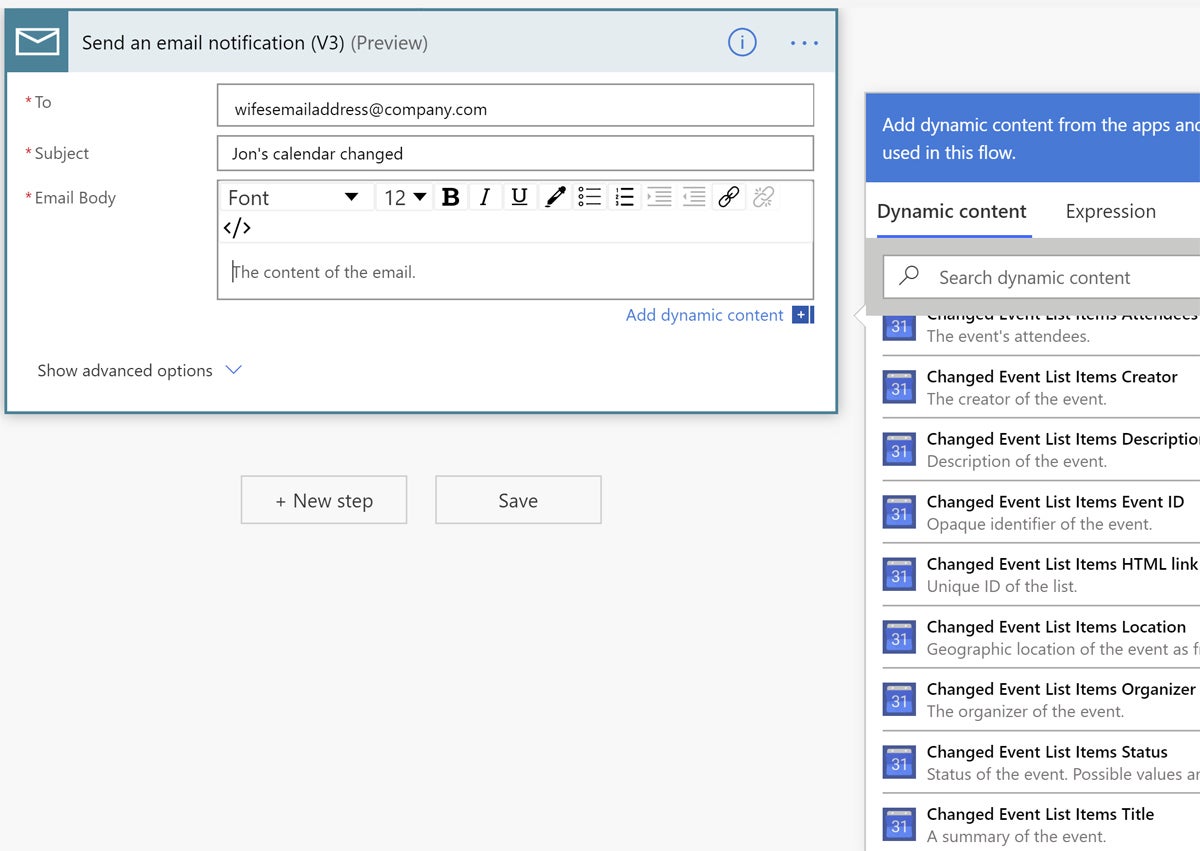
Now we can populate the email message we’re sending out. Enter one or more email addresses and type in the subject line. (I’m going with “Jon’s calendar changed.”)
This segues nicely into one of the more powerful features of Flow: dynamic content. Flow understands different properties or aspects of the information that is contained in the triggering actions, and can use that information interactively later on in the flow. Here, for instance, we can take the title and description of Google Calendar entries (information that currently exists only within Google) and have Flow magically insert that data into a message that is created and exists nowhere near the Google service. This is the integrative power of Flow at work.
Put your cursor in the Email Body section of the action screen, click the Add dynamic content link below it, and then add in the following:
- Changed Event List Items Title
- Changed Event List Items Description
 IDG
IDG
Adding dynamic content to the body of the email. (Click image to enlarge it.)
Then click + New step to move on.
In the next action screen, search for “OneNote,” and then click Create section in a notebook from the list below. For this to work, you will need a OneNote notebook created and stored in your Office 365 account in OneDrive for Business. Choose the appropriate notebook under Notebook Key. Put your cursor in the “Name of the new section” field, click Add dynamic content below it, and then select “Changed Event List Items Title” and click the Save button.
 IDG
IDG
Adding an action that will create a section in a shared OneNote notebook. (Click image to enlarge it.)
As soon as I saved the flow, I noticed it was running, and sure enough, someone in our department at work had changed our monthly meeting date.
My wife got the email with the details:
 IDG
IDG
Email notification successfully received. (Click image to enlarge it.)
And our shared OneNote notebook had a new section added, ready for notes and information:
 IDG
IDG
The OneNote notebook is ready for details to be added. (Click image to enlarge it.)
It’s fairly easy to imagine how you could build out further flows and customize them based on the types of events that are changed, who needs to receive your messages, and more. You can even build on premium capabilities like sending SMS text messages through a third-party service, or updating a Salesforce contact record.
As you’d guess, you can find all of your flows in one place by clicking My flows in the left navigation pane. Hover over any flow in the list to see buttons that let you edit it, share it, or take other actions such as viewing its run history or turning it off.
Demo flow 2: Approvals based on SharePoint list entries
Here’s another example of a flow: Let’s say you store incoming customer service requests, or leads, or whatever else on a simple SharePoint-based list. For our example here, we’ll create a list that is used to request new IT equipment, like computers, projectors, or anything else with a budget impact. We’ll create an instant flow that requests manager approval when any item is entered into the list.
This example will demonstrate how to initiate flows from within the attendant Office 365 applications rather than creating a flow from scratch using the creator site.
Note: This flow requires that your manager be set within your Azure Active Directory profile—that’s what the Flow engine uses to determine to whom to route your request. Most organizations have already input this information as part of their onboarding into Office 365; if not, you can find out how at Microsoft’s Azure Active Directory documentation.
- Create a new SharePoint list if you don’t have one handy — on the menu bar, click New, then List, then fill in the description.
 IDG
IDG
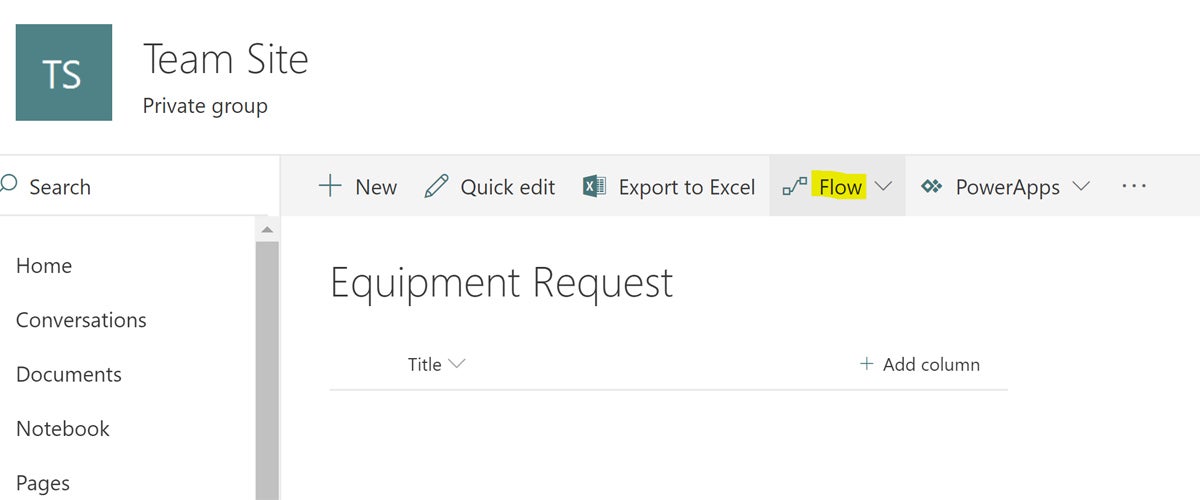
Starting a flow from within SharePoint. (Click image to enlarge it.)
- On your SharePoint list, in the menu bar, click Flow, and then click Create a flow.
- Select Request manager approval for a selected item.
- You’ll see a confirmation screen that describes what’s going to happen within the flow, as well as a list of services and features that the Flow will use — in this case, SharePoint, Office 365 Users, Approvals, Mail, and Notification. Click the Create flow
- Head back to the SharePoint list and add an item.
- Select the saved item and in the menu bar, click Flow, then click your newly configured flow, Request manager approval for a selected item.
- A sidebar will open, reiterating what services the flow will connect to. Click Continue, and you’ll see a box where you can add a message to the manager further explaining the request. Click the Run flow button to finish.
 IDG
IDG
Add a message to your manager to explain your request, then click Run flow. (Click image to enlarge it.)
Flow licensing and costs
Flow is licensed as a service and is charged based on the number of times flows are run. Each flow that is triggered, whether automatically or manually, is considered a run. If Flow is just checking for the presence of new data, that is not considered a run, although the timing permitted between checks differs between license levels.
Microsoft has three levels of pricing for Flow, in a kind of light/medium/heavy usage approach. The Flow Free version includes up to 750 runs per month and 15-minute checks. Flow Plan 1 includes 4,500 runs per month and 3-minute checks, includes access to premium connectors, and costs $5 per user per month. Flow Plan 2 includes up to 15,000 runs per month and checks every minute, and also includes premium connectors, policy settings, and access to the business process flow types. Flow Plan 2 costs $15 per user per month.
Enterprise and education versions of Office 365 and Dynamics 365 also include Flow for 365, which is a plan type that includes 2,000 runs per month and 5-minute checks but no access to the premium connectors or business process flow types. You can’t buy this plan separately — it comes as a part of your 365 subscription.
The last word
Microsoft Flow provides a service like Zapier and IFTTT that is well integrated with both Microsoft Office 365 and many other popular cloud services used by individuals and businesses alike. While I’m not exhaustively comparing Flow to IFTTT and Zapier, Microsoft shops and especially organizations already in bed with Office 365 may find integrating flows into their daily work easier and more user-friendly. Whatever the situation, using flows can mean the difference between forgetting subtle but critical details in business workflows and having all of your bases covered.


