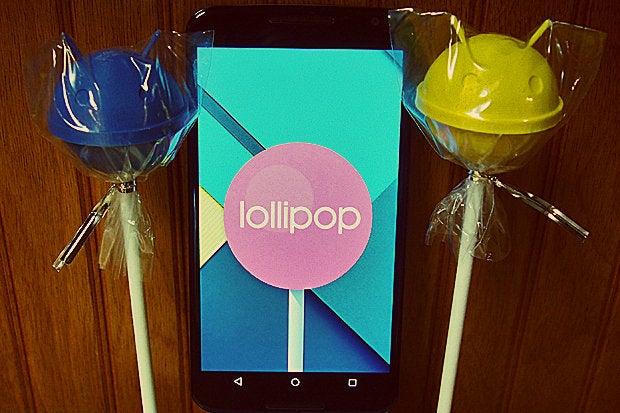
All right -- you've heard all about Google's Android 5.0 Lollipop release. You've read the reviews. Now what should you do once you actually get your hands on the software?
There's plenty of new stuff to see, of course -- but once you've finished exploring all the fresh and fancy visuals, here are 10 cool things to try with Lollipop on your Android phone or tablet:
1. Set up a trusted Bluetooth device.
If you have a Moto phone, you may have done this before -- but for the rest of the world, it's uncharted terrain: the ability to have your Android device stay unlocked anytime a specific Bluetooth device is present and paired.
To set it up, head into your phone or tablet's system settings and tap "Security." Make sure you have "Screen lock" set to something other than "Swipe"; you'll need to have a pattern, password, or PIN established so your phone can automatically secure itself whenever your trusted Bluetooth device isn't around.
Once you've done that, tap "Smart Lock" on that same menu and then tap "Trusted devices." Tap the red plus sign and follow the prompts to pair your smartwatch, car stereo, portable speaker, or practically anything else -- then sit back and enjoy having easy access to your Android gadget whenever the Bluetooth device is nearby.
(You probably don't have access to it yet, by the way, but you'll soon be able to set a trusted place as well. An incoming update to Google Play Services should add that option to all Lollipop devices within the coming days.)
2. Check out the revamped Face Lock feature.
While you're in that same "Security" menu, go back into "Smart Lock" and tap "Trusted face." Follow the prompts to train the system to recognize your face, then press the power button and give it a whirl.
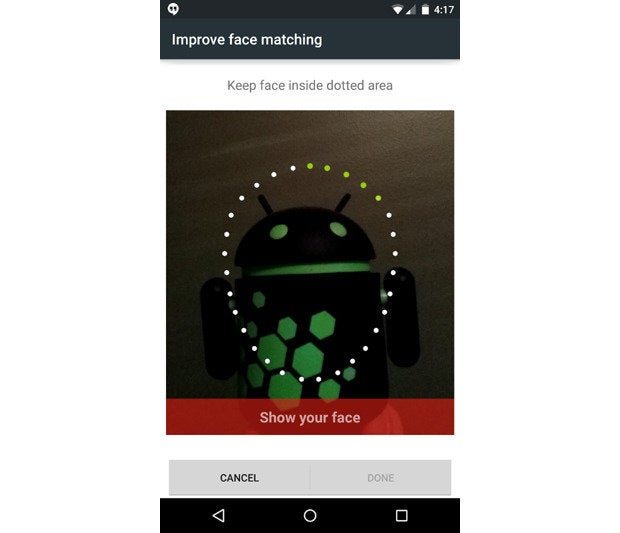
As you'll see, Face Lock works far faster and more reliably than it did in the past, when it was novel but just too darn finicky and slow to be practical. With Lollipop, the system starts working to identify your face the second the screen is activated. More often than not, by the time you swipe away the clock, it'll already have you recognized and ready to get through without the need for further security.
3. Take Lollipop's always-listening voice command system out for a spin.
Provided your phone or tablet supports it, you can now give voice commands anytime -- even when your device's display is off.
The option to activate the feature is a bit buried: Head into your system settings, tap "Language & input" and then "Voice input," then tap the gear icon next to "Enhanced Google services" and look for a line labeled "'Ok Google' Detection."
Tap it, then tap the line labeled "Always on" and follow the prompts to train the system to recognize your voice. While you're in that menu, think about whether you want voice commands to work even when your phone is locked with a pattern, PIN, or password; if you do, tap the line labeled "When locked" before you exit out.
Once you're all done, just say "Okay, Google" and your phone will start listening. You can then ask it a question or give it all sorts of commands and have it work for you whether it's in your hands or not.
4. Interact with a notification on the lock screen.
Lollipop brings a whole new look to the Android lock screen, and your personal notifications are the main attraction. Next time you press your device's power button and see a notification waiting, try swiping it horizontally in either direction to dismiss it. You can also tap on it twice to open it or swipe downwards on it to expand it and gain access to any quick commands available (like archiving or replying to an email).
5. Set up and try priority notification mode.
One of Lollipop's more complex but also potentially useful features is the system's new priority notification mode -- essentially a customizable "do not disturb"-style setting for your tablet or phone. Whenever the priority mode is active, only notifications that are considered "high priority" will make a sound and alert you; any other notifications will show up but remain silent.
To get started, press your device's volume up or volume down key while the display is on and then tap "Priority" in the panel that appears at the top of the screen. Select either to leave that mode on indefinitely (the default) or to specify a finite amount of time -- an hour, two hours, whatever -- for which it'll remain active.
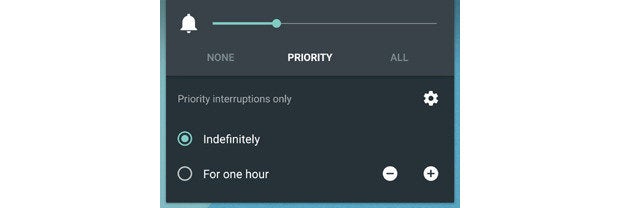
While you have that panel open, take a minute to visit the priority notification settings to make sure it's set up the way you want: After pressing a volume key and tapping "Priority," tap the gear icon next to the words "Priority interruptions only." Now think about what types of notifications you want to alert you when you have the priority mode active. You can opt to allow any combination of events and reminders, calls, and messages -- and with the latter two, you can either allow any calls and messages to come through or allow only calls and messages from approved contacts.
6. Schedule a recurring priority notification mode.
Lollipop's priority notification mode can automatically activate itself at certain recurring times -- if, say, you want your phone to remain silent except for emergency calls and messages during the night.
Go back into that same menu we were just in (you can also get to it by going into the main system settings and tapping "Sound & notification," then "Interruptions"). Scroll down to the bottom of the screen and select what days and times you want the priority mode to activate.
Once you've done that, your device will automatically go into priority notification mode during those windows -- and you'll be bothered only by the notifications you absolutely need.
7. Customize how app notifications behave.
Want to take things a step further? Lollipop lets you customize notifications on an app-by-app basis so that any app's alerts can be considered "high priority" all the time.
If you set an app to be high priority, you're effectively whitelisting it: Any notifications generated by that app will always alert you, even if your device is in priority-only mode. The app's notifications will also always appear at the top of your notification panel, above any others.
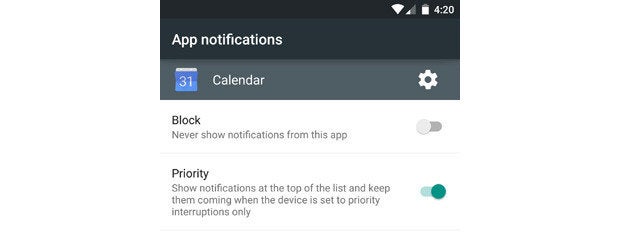
All you have to do is head into your system settings, select "Sound & notifications" and then select "App notifications." Tap any app you want to customize, then toggle the switch for "Priority" to whitelist it.
8. Prepare your phone for guest access.
If you ever pass your phone or tablet off to a friend, Lollipop's new guest mode is well worth exploring.
To see how it works, open up your device's Quick Settings panel by swiping down from the top of the screen and then swiping down a second time. Tap the circular avatar at the far right corner, then tap "Guest."
When you're ready to switch back to your own account, do that same thing but tap your name instead of "Guest." If you have a security pattern, PIN, or password set, you'll be prompted to enter it before proceeding.
9. Pin something to your device's screen.
We've all been there: Someone you know needs to borrow your phone "for a quick sec" to make a call or look something up online. Or maybe you want to hand your device over to the little one so she can play a game while the grown-ups talk. A new Lollipop feature called Screen Pinning is designed to let you do those types of things without any hassle -- and without having to worry about the person getting into something they shouldn't.
Take a moment now to enable it: Go into the main system settings, select "Security," scroll down to "Screen Pinning," and set it to "On."
Then take it for a test run: Tap the Recent Apps key (the square to the right of the Home key) and scroll upward. You'll see a pushpin icon on the most recent app or process you've had open. Tap it and then confirm that you want to pin that process.
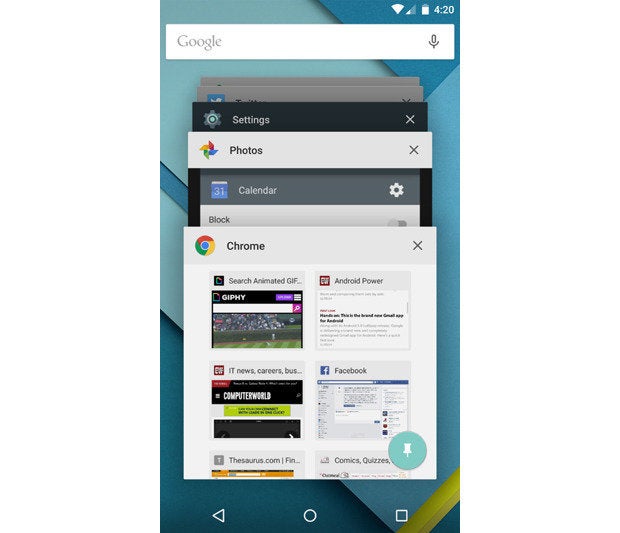
Your device is now locked to that one process -- so if you hand it off to anyone, it's the only thing they'll be able to use. No returning to the home screen, no seeing notifications, no opening up anything else on the device.
To exit the pinned mode, press the Back and Recent Apps (apparently also now known as "Overview") buttons at the same time. If you have a PIN, pattern, or password set -- which you should if you want this feature to have much meaning -- you'll need to enter it in order to return the device to its normal state.
10. Beam something to another device.
Android Beam has been around for a while, but it's always been hard to know exactly when and how it can work. With Lollipop, Beam is integrated into the system sharing function and is consequently easier to use and more versatile than ever.
See for yourself: Open up the Photos app on your device and tap any image you like. Then tap the share icon at the bottom of the screen and select "Android Beam" from the list of choices that appears.
Your phone or tablet will instruct you to bring another Android device against its back. Just make sure the other device is unlocked, then bring them back to back -- and shazam: The photo you selected will transfer wirelessly from one device to the other, even if the other device isn't on Lollipop. No wires, no special apps, no third-party services required.
(Both devices will need to support NFC in order for this to work, but pretty much every reasonable Android device released in the past few years does.)
You can do the same thing anywhere the share command is available -- a social media app, a file manager, you name it. Images, links, contacts, and any other type of shareable content should work.
Bonus: Try your hand at Lollipop's hidden Flappy Bird game.
Google loves including fun little Easter eggs in its products, and Lollipop is no exception. Go into your system settings, select "About phone" (or tablet) and then tap the line labeled "Android version" a bunch of times in a row.
When you see a large Lollipop graphic appear on your screen, tap the circle part of the image about five times and then press and hold your finger to it. You'll then be taken into an Android-themed Flappy Bird-like game, with lots o' lollipop obstacles to jump through and avoid.
Flap, flap, flap. One final tip: If you find yourself playing for more than 10 minutes, put down your device and smack yourself in the head with the nearest rubber mallet. You'll thank me later.


